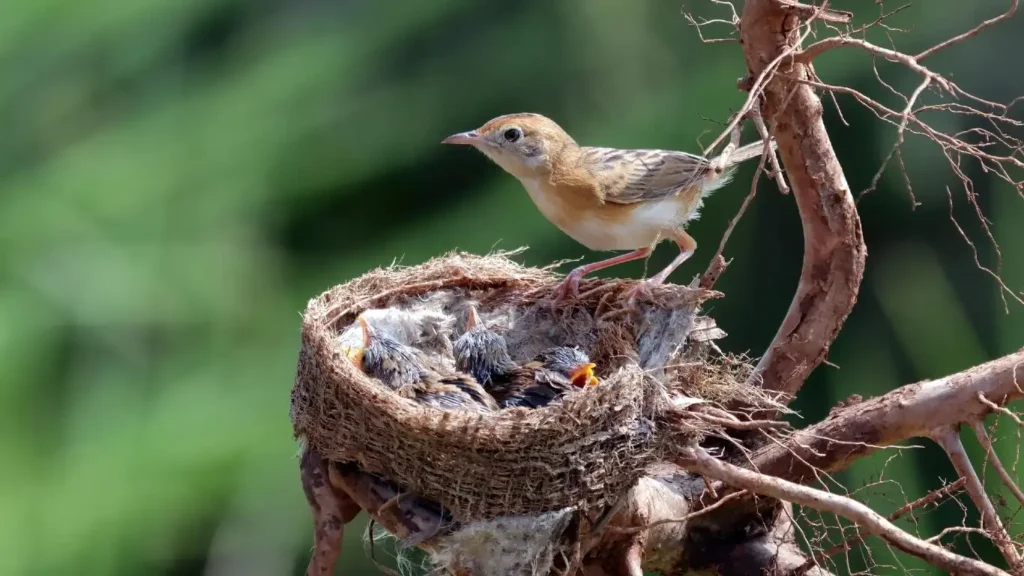
How to Make Bird Nesting Boxes With Coconut Husk?
With the human population rate skyrocketing and deforestation reaching an all-time high, birds and other animals are losing their homes at an alarming rate. As co-inhibitors of this world, it is our duty to help the helpless sustain and survive.
Building Bird boxes is one of the best ways we can ensure the sustenance of birds. Through this blog, we’ll explore how to make a bird nesting boxes using a sustainable and readily available material – coconut husk.
Benefits of Using Coconut Husk for Nesting Boxes
There are a multitude of reasons why you should choose coconut husks as the medium for the nesting boxes. Some of them are
- Coconut husks are environment-friendly and sustainable for our planet. By upcycling coconut husks into bird nesting boxes, not only are we helping our feather companions but also promoting sustainability
- Coconut husks are highly durable and is surprisingly strong and weather-resistant, providing a sturdy shelter for birds. Additionally, the fibrous material offers natural insulation, keeping chicks warm in chilly weather.
- Coconut husk is a natural material, free from harmful chemicals or toxins. This creates a safe environment for birds to raise their young.
Step-by-Step Guide to Making Bird Nesting Boxes
Before diving into the step-by-step guide on how to make bird nesting boxes, let’s take a look at the raw materials that you must procure to create the bird nesting box.
Raw Materials
- Dried coconut husk (enough to cover the desired box size)
- Strong twine or rope
- Drill with various drill bits (wood and masonry)
- Saw (optional, for shaping the husk)
- Sandpaper
- Staples or nails (optional)
- Ruler or measuring tape
- Pencil
Instructions
Now, let us take a look at how to make bird nesting boxes with coconut husks.
- Prepare Coconut Husk: The first step in preparing the nest would be to choose the right coconut husks. While choosing, ensure that you select husks that are comparatively flat and devoid of cracks or inconsistencies. Use sandpaper to smoothen any rough edges. If desired, you can use a saw to shape the husk pieces into desired shapes for the box walls and roof.
Another option would be to choose coir-based nesting materials which are available in the market. Reptilair’s reptinest is our recommendation for safe bird nesting material. They make some of the safest bird nesting materials in the market.
- Assemble the Box Walls: Arrange the husk pieces that you selected to form the walls of the box. Use twine or rope to bind the pieces together securely. Another alternative for a sturdier construction is that you can drill small holes through the husk pieces and fasten them with staples or nails.
- Create the Entrance Hole: Using the appropriate drill bit, create a circular entrance hole on one of the husk walls. The size of the hole will depend on the type of birds you want to attract. Here’s a general guideline:
- Small birds (wrens, chickadees): 1.25 inches (3.2 cm) diameter
- Medium birds (bluebirds, robins): 1.5 inches (3.8 cm) diameter
- Large birds (starlings): 2 inches (5 cm) diameter
While making the hole, ensure that birds can move in and out of the nest comfortably and won’t hinder their day-to-day activities.
- Craft the Roof: You can create a simple gabled roof by cutting two triangular pieces of husk and securing them to the top of the box walls with twine or nails. Ensure the roof overhangs slightly at the front to provide extra protection from rain.
- Drainage Holes: Drill a few small holes near the bottom of the box to allow for proper drainage and prevent water build-up.
- Mounting: Drill a hole through the back of the box for hanging. You can use strong twine or wire to securely attach the box to a tree branch or post.
Tips for Placement and Maintenance
Choosing the right location for the nest box is a very critical step. While choosing a location, make sure that it is a quiet, sheltered location away from strong winds and direct sunlight. If possible, make sure the nest is kept in a location safe from predator attacks and between 6 and 10 feet (1.8 to 3 meters) above the ground, facing away from prevailing winds.
While mounting the box, ensure that it is firmly kept in place with screws and bolts. Make sure that the box does not come lose when facing nature’s elements.
Make sure to clean the nesting box annually after the breeding season has ended. Remove old nesting materials and disinfect the box with a mild soap solution. Allow the box to dry completely before hanging it back up.
Conclusion
With the world becoming more colonized, it is our duty to go back to our roots and protect the wilderness. From keeping a feeding tray for birds to building bird boxes, we must take it upon ourselves the duty of protecting our feathered companions. By following these simple steps, you can create a cozy haven for feathered friends in your backyard or garden.
So, why not give it a try? Let’s play our part today!